The Yellow Wind Sage is the ultimate boss of chapter 2 in Black Delusion: Wukong, and he’s way more tough than most different bosses within the sport. He’s a compulsory boss and the intestine verify between you and chapter 3.
On this Black Delusion: Wukong information, we’ll stroll you thru learn how to discover the Yellow Wind Sage, when to combat him, and learn how to take him down.
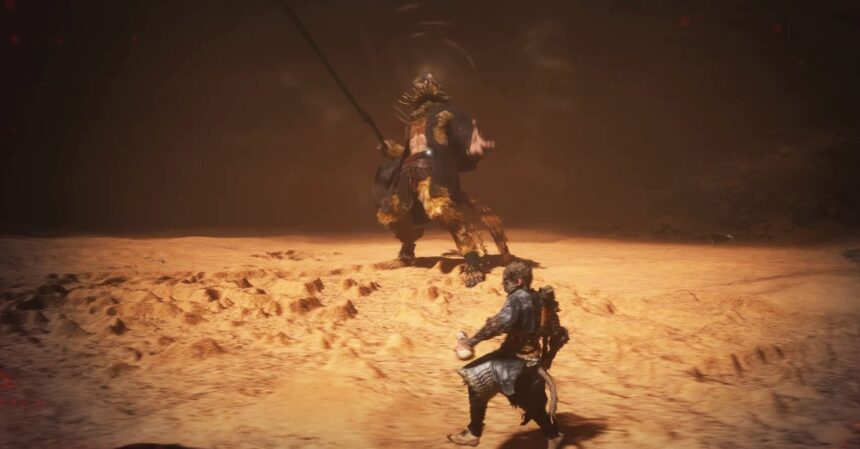
The place to search out the Yellow Wind Sage in Black Delusion: Wukong

Picture: Recreation Science by way of epicgamejourney
The Yellow Wind Sage isn’t a boss you’ll be able to unintentionally miss, as you gained’t have the ability to progress the sport till you defeat him. Nonetheless, it’s not completely clear that you simply’re strolling right into a boss enviornment if you strategy him.
There are two shrines near the Yellow Wind Sage, and you’ll strategy him from both path. The primary is the Windseal Gate Shrine on the Yellow Wind Formation. The Second is the Cellar Shrine in Crouching Tiger Temple. To have interaction the boss, stroll into the large sandstorm and the cutscene will play.
When you’re struggling to defeat the Yellow Wind Sage, relaxation on the Cellar Shrine because the run again is a bit shorter.
When to combat the Yellow Wind Sage in Black Delusion: Wukong

Picture: Recreation Science by way of epicgamejourney
Not like the Wandering Wight, you’ll be able to’t simply depart the realm and are available again if you’re able to combat. There’s solely a lot sport you’ll be able to play earlier than you need to defeat the Yellow Wind Sage to be able to progress. That stated, you’ll be able to nonetheless delay the method so long as attainable, making certain you’ve gotten loads of ability and stat upgrades.
A very powerful factor so that you can do earlier than battling the Yellow Wind Sage is unlocking the power to craft medication with Xu Canine. When you’ve accomplished the primary leg of his quest, you’ll have the ability to craft Celestial Medicines after you attain the Cellar Shrine — which is correct close to the boss. This may also help you dramatically enhance your stats, together with protection, stamina, well being, and mana — all invaluable stats as you head into this boss. You’ll additionally have the ability to craft consumables that may allow you to increase your injury — permitting you to chew by means of the Yellow Wind Sage’s extraordinarily massive well being bar even sooner — or enhance your protection for a short while.
Easy methods to beat the Yellow Wind Sage in Black Delusion: Wukong
The Yellow Wind Sage will make fast work of you for those who can’t dodge his assaults, so let’s begin there:
- Employees Spin: The Yellow Wind Sage swings his employees in a half-circle, swings wildly, after which slams it into the sand. This transfer seems to be sooner than it’s. Dodge across the boss’ facet, by means of the swings, to keep away from taking injury.
- Sand Forks: The Yellow Wind Sage will elevate his employees into the air and slam it into the sand, spear head first. This may deal injury and trigger an eruption of forks to shoot out of the sand in entrance of him. Dodge round to the facet if you see him maintain his employees up.

Picture: Recreation Science by way of epicgamejourney
- Leaping Stomp: The Yellow Wind Sage can soar into the air and slam his foot down. This offers injury in a small space. The transfer is fairly fast, but it surely has a really apparent inform — his ft will utterly depart the bottom. Simply dodge again away from him to keep away from getting stomped.
- Disengage: The Yellow Wind Sage will swing his stick down at you as he jumps away. While you’re punishing him, look ahead to his arm to come back down at his facet whereas holding his employees. When it does, again away from him with a dodge and reset.
- Charging Combo: When the Yellow Wind Sage has a little bit of distance on you, he’ll step ahead with a swing from his employees, do a fast combo in entrance of him, do a leaping back-handed slam into the sand, after which do one other spin when he lands. All of those strikes are dodgeable and so they have a rhythm to them. Look ahead to the stick to come back towards you and dodge on the final second. Keep near him and you’ll punish when the combo ends.

Picture: Recreation Science by way of epicgamejourney
- Wind Slash: The Yellow Wind Sage will swing his stick in entrance of him, sending out a line of damaging wind in your path. Watch for the projectile to get near you and both dodge by means of it or soar over it. Remember that typically he’ll shoot three without delay.
- Storm Spin: When you get the boss’ well being right down to about two-thirds, he’ll do an enormous spin round him that offers injury in an space and summons the storm. These swings are very gradual, so simply dodge by means of them.
- Summoned Echoes: The Yellow Wind Sage will sometimes disappear into the storm and ship echoes out to combat you. These echoes simply do one combo after which depart. Just like the boss, you’ll get a really feel for these patterns finally, however watch for a similar issues because the Yellow Wind Sage: the stick and the ft. You’ll be able to’t deal any injury to those guys, so simply concentrate on dodging.
- Return Combo: As soon as each of his echoes have attacked, the Yellow Wind Sage will leap again into the sector with an assault of his personal: a delayed stomp. He offers you loads of warning for this one, so again away in case your stamina is low, or dodge by means of it for an opportunity to deal some injury after.

Picture: Recreation Science by way of epicgamejourney
- Punt Seize: One of many Yellow Wind Sage’s most devastating and annoying strikes is his seize. He’ll deal tons of harm with this transfer earlier than throwing you again on the bottom. To make issues worse, the inform may be very delicate, because it begins with a little bit punt. Within the second section, attempt to control his ft and dodge everytime you see him begin to kick out fairly than stomp.
- Headless Spear Combo: When the Yellow Wind Sage returns from his journey within the sands, he’ll be a lot sooner and use his hand to summon pitch fork assaults. The precise combos aren’t that completely different — stomping along with his ft and huge sweeps with the employees — however you’ll be punished extra for not dodging by means of them. Regulate his employees always that can assist you time your dodge.

Picture: Recreation Science by way of epicgamejourney
- Beetle Summon: Within the second section, the Yellow Wind Sage will sometimes scream, inflicting an enormous beetle fabricated from sand to fly out of the bottom and physique slam you. This factor is tremendous scary and hurts very badly, however the window to dodge it’s fairly lengthy. Dodge a little bit sooner than you assume it is advisable, because the shoulder blade will get near you.
- Twister Summon: When you attain the underside fourth of his well being bar, the Yellow Wind Sage will summon a storm. He’ll stick his employees within the sand for this and begin spinning his palms. Take the possibility to beat him down whereas he does this, earlier than the sector will get very disagreeable.
- Remaining Combo: As soon as the storm comes, the Yellow Wind Sage will primarily do a combo that entails a number of sweeping along with his stick. The unhealthy information right here is that you’ve little or no room to dodge now and he’s a lot tougher to see. The upside is that his glowing spins are seen by means of the sandstorm, so simply do you finest to time your dodge.
- Remaining Summons: Because the storm rages on, the Yellow Wind Sage will ship in his echoes once more, who will do extra highly effective combos. These may be very arduous to see within the sandstorm, so simply search for the glow of their sticks to time your dodge.

Picture: Recreation Science by way of epicgamejourney
The Yellow Wind Sage may be very aggressive, however his strikes are all fairly predictable. Nonetheless, the boss is grueling for numerous different causes outdoors of the uncooked “issue” of the combat.
First, it’s very lengthy, which might make demise’s really feel much more exhausting than regular.
Second, the boss has a number of phases the place you’ll be able to’t goal him for brief intervals of time, which each elongates the combat and stops you from with the ability to brute-force the encounter, that means you should study his patterns.
Lastly, there’s the ultimate section. As you battle the Yellow Wind Sage, the storm that surrounds the sector shrinks and shrinks. And to make issues worse, the boss will summon a number of mini tornadoes to spin across the ever-shrinking enviornment. This usually ends in you getting juggled by the storm after which bounced right into a twister till you’re lifeless. The digital camera doesn’t assist both, as it may be extraordinarily tough to see by means of the storm within the hectic remaining moments.
It’s best to get actually good on the first three-fourths of the combat so it can save you all of your methods (and mana) for the tip. Earlier than the Yellow Wind Sage begins summoning storms, he’s only a mildly annoying boss with a number of well being that hits fairly arduous. However like we talked about earlier than, his transfer set is easy to study and his tells are fairly apparent. When you’re scuffling with this combat, attempt to get by means of as a lot of it as attainable with out utilizing any spells in any respect — simply you, your stick, and the boss.

Picture: Recreation Science by way of epicgamejourney
As soon as you’ll be able to reliably get to the ultimate section, you’re in enterprise. When you’ve seen the “random bullshit, go!” meme, channel that power. As quickly as he summons the storm, beat on him as a lot as attainable. Finally he’ll soar out and ship his echoes in after you once more. It is a nice time to make use of your Transformation spell to offer your self one other well being bar. You too can chug some Evil Repelling Medication to assist enhance your defenses. As soon as the boss returns, use Immobilize to stun him, summon your clones with Pluck of Many, and use your Spirit Ability to slam him. The objective right here isn’t essentially to be quick — though that helps — however to simply use any and all instruments you’ve gotten left to defeat him in his most chaotic second.
Finally you’ll both get the grasp of this very irritating dance otherwise you’ll get fortunate and get a very good sample within the storm. Both method, do not forget that a win is a win. Get pleasure from your new relic, a bunch of nice crafting supplies, and the brand new nightmares ready for you in chapter 3.
In search of extra assist in your journey because the Destined One? Take a look at our different Black Delusion: Wukong guides, which may also help you discover all three hidden bells in chapter 1, sober up the Yellow-Robed Squire in chapter 2, determine learn how to craft medication, and monitor down all of Buddha’s Eyeballs.