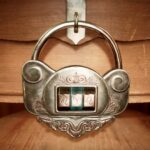
The Lighthouse statues puzzle is obtainable when you end Dragon Age: The Veilguard’s prologue and attain the Lighthouse, your base of operations. You’ll discover a door within the library with a mysterious observe that claims, “Three conferences, face-to-face, below the sky.”
This observe refers to a multi-pronged puzzle that takes place in and across the Lighthouse. At first, you’ll must make three pairs of statues face one another, however you’ll additionally want to trace down some wisps as effectively.
Our Dragon Age: The Veilguard information will present you the full Lighthouse puzzle resolution, together with the place to search out (and tips on how to orient) all three pairs of statues.
Methods to begin the Lighthouse statues puzzle in Dragon Age: The Veilguard
.As quickly as you’ve got entry to the Lighthouse, you’ll be capable of discover the magically locked door. Over within the library — the principle room the place you’ve got all of your conferences — you’ll discover the door on the north wall.

Picture: BioWare/Digital Arts by way of epicgamejourney
The observe subsequent to it reads, “Three conferences, face-to-face, below the sky.” What this implies for you is that there are three steps to the puzzle, every step should do with faces (or dealing with), and all of the steps are outdoors within the courtyard.
Lighthouse statue puzzle resolution

Picture: BioWare/Digital Arts by way of epicgamejourney
Head out of the library towards the workshop outdoors. Take a proper and loop round to the curving stairs. Up on the prime, you’ll discover a statue which you can rotate. (Later, you’ll be capable of — and will, typically — play rock-paper-scissors in opposition to Manfred right here.)
There’s one other observe right here that claims “To enter the library passage, three pairings should meet face-to-face.” So you must discover three pairs of statues and make them level at one another.
Statues #1 location and place

Picture: BioWare/Digital Arts by way of epicgamejourney
Use the lever arm protruding of the statue’s base to rotate it round in order that it faces east towards the eating corridor. In case you look that approach, you may see the statue that you could level again at this one.
Head to the eating corridor and round to the fitting (south) facet. Rotate the statue there so it factors again on the library to the west.
Statues #2 location and place

Picture: BioWare/Digital Arts by way of epicgamejourney
In your approach again, head to the north and face Neve’s research, however don’t go inside. Simply to the fitting of the steps as much as her room, there’s a spot you may drop down and move beneath. Achieve this, and also you’ll discover one other statue to the north.
Rotate this one so it faces west (again towards the library). Look off that approach to spot one other statue that’s behind Belara’s workshop. That one’s a lot simpler to get to — simply go across the left facet of the constructing. Level that one to the east.
Statues #3 location and place

Picture: BioWare/Digital Arts by way of epicgamejourney
The ultimate pair of statues is again the place you began. Head again towards the library and go up the steps to the primary statue. This time, proceed previous till you’re on the touchdown immediately above the door into the library. There’s a pair of statues there. Flip them in order that they’re dealing with one another.
Undergo the Music Room
Whenever you head again into the library, the door on the north wall will open (extra on the matching door on the south wall in a minute). Head by way of to search out the music room.

Picture: BioWare/Digital Arts by way of epicgamejourney
Choose up the whole lot you may inside, after which flip your consideration to the door on the left (west) facet. It wants two wisps to open. One is floating proper there by the piano. Get it put in in one of many pedestals by the door.

Picture: BioWare/Digital Arts by way of epicgamejourney
The Caretaker will seem and inform you that, “One other helper waits, between the dealing with gods.” (They’ll go away behind a observe saying the identical.) Whereas cryptic, all this implies is that the subsequent wisp is on the final pair of statues — those above the door into the library.
Head outdoors and retrieve it.
Carry the wisp again to the music room and the subsequent door will open, revealing a portal.

Picture: BioWare/Digital Arts by way of epicgamejourney
Step by way of, and also you’ll end up on a excessive balcony above the library — a part of the Lighthouse you couldn’t attain in any other case.
Earlier than you do the rest, seize the wisp from the balcony and put it within the new pedestal throughout from the portal. This opens one other portal that we’ll step by way of in a second.
On the balcony, activate the system within the left nook. This repairs and restores the library’s astrolabe and, extra importantly, reductions the upgrades for the Caretaker’s workshop.
Head again up the steps and step by way of the second portal.
Methods to open the second locked Lighthouse door

Picture: BioWare/Digital Arts by way of epicgamejourney
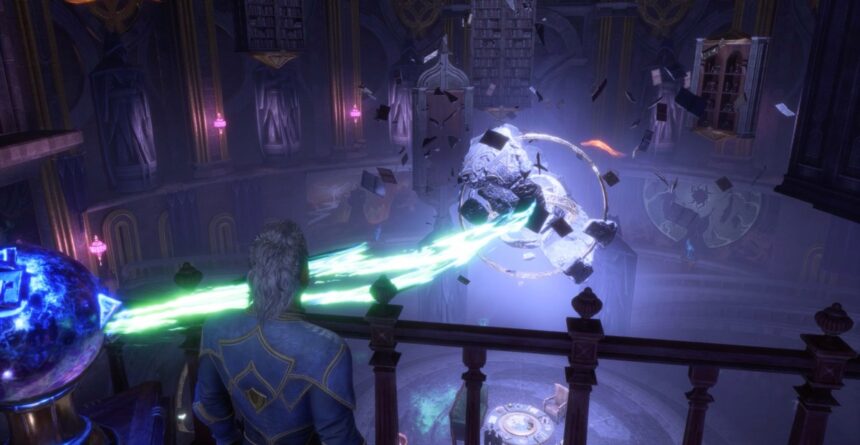
You’ll step out onto a balcony above the watchtower. Open the chest after which seize the floating crystal. Place it within the beam system.
Your job is to level it at three crystals to free wisps. These crystals are floating above three domes proper in entrance of you.
As soon as all three wisps are free and float off towards the library, make your approach again. This time, the door on the south wall will open, revealing (but) one other portal. Step by way of
Lighthouse puzzle rewards

Picture: BioWare/Digital Arts by way of epicgamejourney
This portal results in the Wolf’s Den excessive above the library. Take the whole lot that’s not nailed down — it’s not like Solas can use it anymore. There’s one other door right here, but it surely simply results in a balcony with a hell of a view.