In Doom: The Darkish Ages, you’ve an extended checklist of weapons at your disposal, every gun with its personal taste. However no matter whether or not we’re speaking in regards to the Fight Shotgun or the Chainshot, you’ll all the time want ammo upgrades for them.
Proper after your Well being and Protect capability, ammo is among the most vital assets in Doom: The Darkish Ages. It’s additionally one of many scarcest. Since you may’t retailer hundreds of bullets for all of the weapons you’ve within the sport, any likelihood of recovering ammo or rising the quantity you may hold with you is all the time welcome.
This information helps you perceive find out how to get ammo upgrades in Doom: The Darkish Ages plus exhibits you the place to seek out all ammo upgrades.
How one can improve ammo in Doom: The Darkish Ages

Picture: id Software program/Bethesda Recreation Studios through epicgamejourney
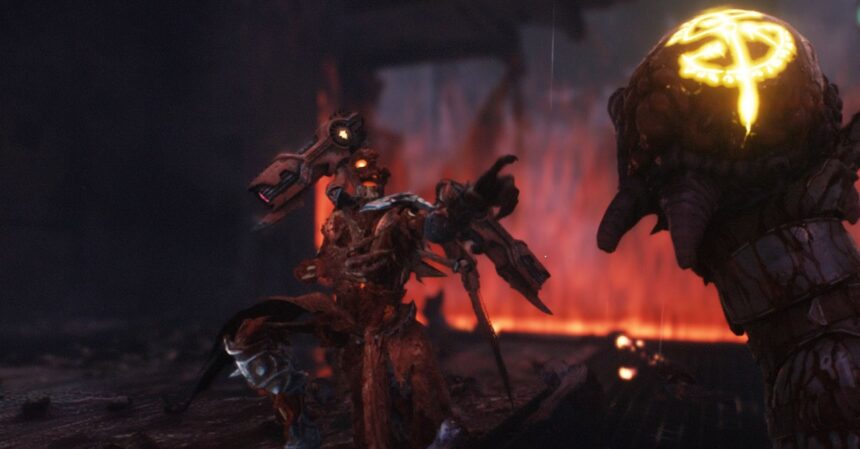
To improve your ammo capability, you want to gather the Demonic Essence of particular leaders — and to take action, you need to discover and defeat them first. Once you discover leaders from whom you may acquire Demonic Essence, a yellow icon displaying three bullets seems above their heads.
Not like the opposite two forms of upgrades, Well being and Protect, while you defeat a pacesetter, they will provide you with an improve for one of many three sorts of ammo within the sport: Shells, Cells, Spikers, Skulls, Reaver, and Launcher.
These upgrades are everlasting, so that you don’t want to fret about having to chase leaders in each chapter.
Under, you discover all of the chapters during which there are leaders who provide you with ammo upgrades in Doom: The Darkish Ages.
The Holy Metropolis of Aratum (Chapter 5)
The fifth chapter of Doom: The Darkish Ages is the primary time you’ve entry to your cyberdragon to discover the areas and search for its secret touchdown zones. This can be a prolonged chapter, however there’s solely one ammo (Shell) improve to get.

Picture: id Software program/Bethesda Recreation Studios through epicgamejourney
To search out the chief, after you’re executed with the tutorial, fly along with your dragon to the primary ship to your proper. You will want to destroy all its canons for the touchdown spot to seem. When you’re in, there isn’t a lot secret. Simply hold following the trail accessible to you till you attain the final room.
The target signal will take you to the bottom platform in entrance of a crimson power gate which you need to destroy dashing along with your protect. Nevertheless, earlier than you may even strive, the chief will seem.

Picture: id Software program/Bethesda Recreation Studios through epicgamejourney
Your first ammo improve chief is an armored Hell Knight. This enemy makes use of the leaping Hell Surge assaults which the common model you’ve already confronted does. They may also throw Hell Surge axes at you, so keep alert to parry them.

Picture: id Software program/Bethesda Recreation Studios through epicgamejourney
The problem on this struggle is to struggle this aggressive enemy in a tiny hall. Give attention to utilizing the Accelerator to interrupt their armor quicker and don’t allow them to nook you.
The Siege – Half 1 (Chapter 6)

Picture: id Software program/Bethesda Recreation Studios through epicgamejourney
Doom: The Darkish Ages’s Chapter 6 will pressure you to traverse an extended and a bit of bit complicated map. To search out the chief who will provide you with an ammo (Spiker) improve, you need to go to the world to the left nook of the map from the beginning gate. The place is marked by a crimson cranium icon in your map.
This struggle is the primary involving the morale system, which signifies that, earlier than you may really struggle the chief — who will likely be attacking as quickly as they spot you — that you must kill the opposite demons within the space to deplete its morale bar.

Picture: id Software program/Bethesda Recreation Studios through epicgamejourney
After getting killed sufficient demons and a message seems saying “Chief Protect Disabled!,” it’s time to shoot. The chief this time is an armored Mancubus and as you might need anticipated your prime precedence is to destroy their armor.

Picture: id Software program/Bethesda Recreation Studios through epicgamejourney
Hold a secure distance from them because the Mancubus will pop their flamethrowers at you for those who get too shut. You may play it secure and search for their signature assault, a wall of power that all the time has one aspect which you’ll be able to parry.
Ancestral Forge (Chapter 9)

Picture: id Software program/Bethesda Recreation Studios through epicgamejourney
Discovering the chief in Chapter 9 who offers you an ammo (Cell) improve is only a matter of reaching the top of the extent. You will want to face one other armored Mancubus. Benefit from the Protect Rune you unlock on this chapter and parry all their assaults.

Picture: id Software program/Bethesda Recreation Studios through epicgamejourney
Watch out with the common enemies round you as you struggle the Mancubus. The struggle is less complicated than the earlier one, so that you don’t want to fret an excessive amount of. It is best to, nevertheless, cope with the Pinky Rider who’s within the enviornment as quickly as attainable to make your life simpler.
The Forsaken Plains (Chapter 10)

Picture: id Software program/Bethesda Recreation Studios through epicgamejourney
Your predominant objective in Chapter 10 is to destroy the 2 Hell Cannons within the Forsaken Plains. By going to the one on the proper aspect of the map, you’ll be nearer to the chief you need to struggle to unlock an ammo (Cranium) improve. They’re indicated by an icon of a topped cranium in a better section of the area.
Once you attain the place, all you discover is a tree. Destroy it along with your protect to summon some waves of enemies. After defeating them, the chief will seem. This time that you must struggle a Revenant, however they don’t have a morale bar, making the encounter much less demanding.

Picture: id Software program/Bethesda Recreation Studios through epicgamejourney
Revenants are fairly agile so strive your greatest to get nearer to them earlier than taking a shot. They normally shoot Hell Purge projectiles and skulls. You realize the drill, go parry them.

Picture: id Software program/Bethesda Recreation Studios through epicgamejourney
For those who see them turning into all white, don’t waste your bullets. The Revenant doesn’t take injury whereas frozen on this state. It’s value parrying the projectiles they may shoot although since they appear to interrupt their ice pores and skin.

Picture: id Software program/Bethesda Recreation Studios through epicgamejourney
In Chapter 13, you’ll once more fly round along with your cyberdragon, destroying ships and coping with tentacles from one other dimension. Typical stuff. Throughout this chapter, there may be additionally an ammo (Reaver) improve so that you can acquire.
By following the principle mission of this chapter, you’ll finally get to the primary touchdown spot on the map. It’s a tower that you just entry after destroying a ship. When you land, the battle in opposition to an armored Mancubus will begin.

Picture: id Software program/Bethesda Recreation Studios through epicgamejourney
Though the technique received’t change when combating them instantly, you need to first clear the world to deplete its morale bar. All the time attempt to search for the bigger enemies since killing the smaller ones doesn’t have an effect on the bar.
Spire of Nerathul (Chapter 14)

Picture: id Software program/Bethesda Recreation Studios through epicgamejourney
Spire of Nerathul takes you to a area you haven’t explored but however don’t fret. The hazards are nonetheless the identical ones. As you progress in the principle mission of Chapter 14, you’ll destroy a statue of the Outdated One and drop right into a gap that takes you to an enviornment.

Picture: id Software program/Bethesda Recreation Studios through epicgamejourney
Enemies will spawn and after defeating a few of them, Chapter 14’s ammo (Launcher) improve chief will seem, a Revenant. Comply with the identical technique recommended for Chapter 10’s chief. Simply watch out as a result of a Komodo, a big behemoth of Hell will struggle alongside the chief.
The Kar’Thul Marshes (Chapter 16)

Picture: id Software program/Bethesda Recreation Studios through epicgamejourney
There may be one chief that will provide you with an ammo (Shell) improve in Chapter 16 and you will discover them by simply following the principle mission. As you make your approach to collect the second Relic Fragment, you will see that an enviornment the place the chief is.

Picture: id Software program/Bethesda Recreation Studios through epicgamejourney
You can be going through an armored Mancubus once more to get your palms on this improve. The actual problem on this struggle is to deal with the Pinky Rider, the Cyberdemon, and the Cosmic Baron who’re additionally within the enviornment. Kill all of them to disable the chief’s protect.
Temple of Lomarith (Chapter 17)

Picture: id Software program/Bethesda Recreation Studios through epicgamejourney
Chapter 17, the Temple of Lomarith is a fairly complicated map and there are two leaders so that you can chase. You discover the first one as you’re attempting to rescue Thira. The realm has an enormous gate within the center so it’s onerous to overlook.

Picture: id Software program/Bethesda Recreation Studios through epicgamejourney
Be able to struggle your approach by waves of enemies containing highly effective ones just like the Vagary earlier than you may disable the chief’s protect. When their morale bar is totally depleted, you may search for the armored Pinky Rider, the primary chief you struggle on this chapter. Defeating them unlocks an ammo (Spike) improve.

Picture: id Software program/Bethesda Recreation Studios through epicgamejourney
Now, the second chief is hidden. By following the principle mission, you ultimately get to a bit the place you utilize inexperienced gates to succeed in some floating wreckage of ships. Earlier than you utilize the second gate, look to your left and you will notice that you would be able to sprint to destroy a wall.

Picture: id Software program/Bethesda Recreation Studios through epicgamejourney
Drop to the extent under and you will notice a tree. As soon as you utilize your protect to destroy it, the room will likely be sealed and waves of enemies will begin to seem.

Picture: id Software program/Bethesda Recreation Studios through epicgamejourney
After killing some enemies, the chief, a Revenant, will come and you need to defeat them to unlock an ammo (Cell) improve. You’re already accustomed to this enemy. Simply watch out because the room is small and you’ll be combating massive enemies inside it.
Harbor of Souls (Chapter 19)

Picture: id Software program/Bethesda Recreation Studios through epicgamejourney
After one hell of a trip to the underworld, it’s time so that you can discover your again to the Mortal Airplane. Nevertheless, earlier than you achieve this, there’s a pacesetter that you must defeat and an ammo (Cranium) improve to assert. Hold following the principle mission and you will see that it.

Picture: id Software program/Bethesda Recreation Studios through epicgamejourney
You face one other armored Pinky Rider on this chapter, who has a morale bar. Benefit from the Berserk cell on this enviornment to struggle the strongest demons round. With them out of the way in which, beating the Pinky Rider is kind of easy.
Resurrection (Chapter 20)
There’s a lot to be executed in Chapter 20, however fortunately discovering the chief — who offers you an ammo (Reaver) improve — of this chapter shouldn’t be one of the troublesome challenges it provides.

Picture: id Software program/Bethesda Recreation Studios through epicgamejourney
Your predominant objective within the first section of this chapter is to destroy the Siege Towers. Following this goal will inevitably lead you to the left a part of the map the place there’s a crimson zone with a topped cranium icon. By getting there, you will see that the chief.

Picture: id Software program/Bethesda Recreation Studios through epicgamejourney
This time a Komodo is the chief, a fairly difficult enemy to face. Give attention to clearing the world of different massive enemies and, when going through the Komodo, give attention to parrying their assaults. They unleash lengthy sequences of assaults so be taught them to know the proper second to struggle again.

Picture: id Software program/Bethesda Recreation Studios through epicgamejourney
There’s one final chief in Doom: The Darkish Ages so that you can search out. Yow will discover them by reaching the final crimson zone on the highest aspect of the map. When you declare their Demonic Essence, you’ll obtain an ammo (Launcher) improve. There are some robust fights earlier than you may attain the place, so be ready.

Picture: id Software program/Bethesda Recreation Studios through epicgamejourney
The chief of Chapter 22 is a Cyberdemon and they’re of their common model, so you already know what to do. Get near them, parry their assaults, and hit the Cyberdemon onerous. They’ve a morale bar, forcing you to struggle a Komodo and different robust demons earlier than the ultimate encounter.