Throwing your defend at demons is the bread and butter of Doom: The Darkish Ages. Nevertheless, Wolf Statues are additionally useful targets to intention your defend at.
In every chapter of Doom: The Darkish Ages, there are a lot of secrets and techniques to find. Maps might disguise little toys in underground tunnels or Nightmare skins in platforms that appear inconceivable to achieve. Discovering all of them just isn’t obligatory, however some rewards — like Gold, Rubies and, Wraithsones — are basic should you plan on upgrading your weapons.
Wolf Statues can give you these supplies as rewards — however provided that you could find them! Under, we’ll present you the place to search out all Wolf Statues we’ve discovered to this point in Doom: The Darkish Ages, plus the rewards you get from them.
The place to search out Wolf Statues in Doom: The Darkish Ages

Picture: id Software program/Bethesda Recreation Studios by way of epicgamejourney
Wolf Statues are guardians of distinctive treasures, and every of them are linked to different Wolf Statues, that are hidden round every stage and can break should you throw your defend at them. The barrier defending the merchandise solely disappears after all of the statues in a given stage are destroyed.
You may know what number of statues you could discover by counting what number of are across the barrier. To determine those you could break, simply search for wolf statues which can be glowing crimson. As you eradicate Wolf Statues across the map, the translucent statues across the barrier flip into stone.
To date, we’ve discovered Wolf Statues in two ranges in Doom: The Darkish Ages:
- The Siege – Half 1 (Chapter 6)
- Ancestral Forge (Chapter 9)
The Siege – Half 1 (Chapter 6)

Picture: id Software program/Bethesda Recreation Studios by way of epicgamejourney
There are three Wolf Statues in Chapter 6 guarding a Ruby, and whereas this map could be somewhat bit byzantine, discovering all three statues just isn’t an excessive amount of bother.
To search out the statues, flip proper from the primary gate. Go forward for some time, destroy a large tank after which look to your left. You will notice, somewhat greater from the place you might be, the three translucent wolves across the Ruby.

Picture: id Software program/Bethesda Recreation Studios by way of epicgamejourney
Now, those you’ll want to break are significantly shut. The primary one is proper beside the realm the place the Ruby is. You have to first kill all of the enemies — which includes defeating a Vagary — within the space to disable the drive area round it.

Picture: id Software program/Bethesda Recreation Studios by way of epicgamejourney
The second statue is hidden inside a small cave subsequent to the ruby as effectively. You may simply see the statue from the place the Ruby is.

Picture: id Software program/Bethesda Recreation Studios by way of epicgamejourney
The ultimate statue is within the other way from the Ruby. When going through the statue holding the Ruby, flip round and you will notice the Wolf Statue.
Ancestral Forge (Chapter 9)

Picture: id Software program/Bethesda Recreation Studios by way of epicgamejourney
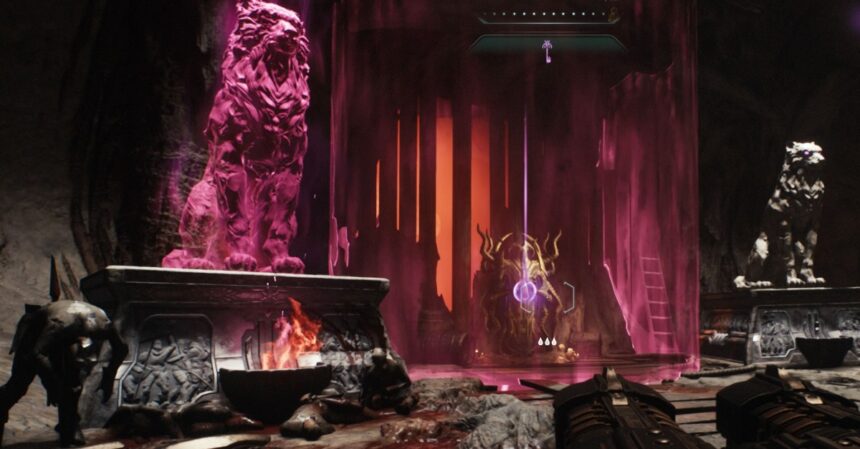
Whilst you attempt to make the Ancestral Forge work once more, you may search for the three Wolf Statues hidden in Chapter 9. You’ll obtain a Wraithstone as soon as you discover all of them, the one materials that unlocks a weapon’s last improve.

Picture: id Software program/Bethesda Recreation Studios by way of epicgamejourney
The Wraithstone and the three Wolf Statues are positioned on the left facet of the map. You’ll find the first Wolf Statue by turning proper to the place the altar is.
Earlier than you even begin searching for the second statue, you must get the Purple Key. To search out it, you wish to go away the primary gate, flip proper and head towards the crimson zone on this path.

Picture: id Software program/Bethesda Recreation Studios by way of epicgamejourney
You have to first defeat the chief on this zone, however when you’re finished, you may look for the doorway to the hall to the left facet of the sector that may take you to the important thing. Break it together with your defend and you will get the Purple Key.

Picture: id Software program/Bethesda Recreation Studios by way of epicgamejourney
Return to the place you began on this chapter and you will see that a Purple Gate. Open it with the important thing to search out the second Wolf Statue.

Picture: id Software program/Bethesda Recreation Studios by way of epicgamejourney
Now, you could find the third and final statue by going to the reverse facet of the map from the place the Wraithstone is. One can find it in an space between the 2 remaining crimson zones. It’s protected by some enemies, however killing them disables the barrier round it.
Verify again quickly for extra Wolf Statues in Doom: The Darkish Ages!