Consider it or not, you can also make AMD’s newest king of the gaming CPU world even quicker, and it received’t even value you any cash. On this information, we’ll present you the best way to overclock the AMD Ryzen 7 9800X3D, enabling you to run the CPU past its inventory clock velocity and squeeze an excellent greater body charge out of it. We’ll take you thru three strategies on this information, one is an automated overclock utilizing Ryzen Grasp, and the others contain delving into your motherboard BIOS.
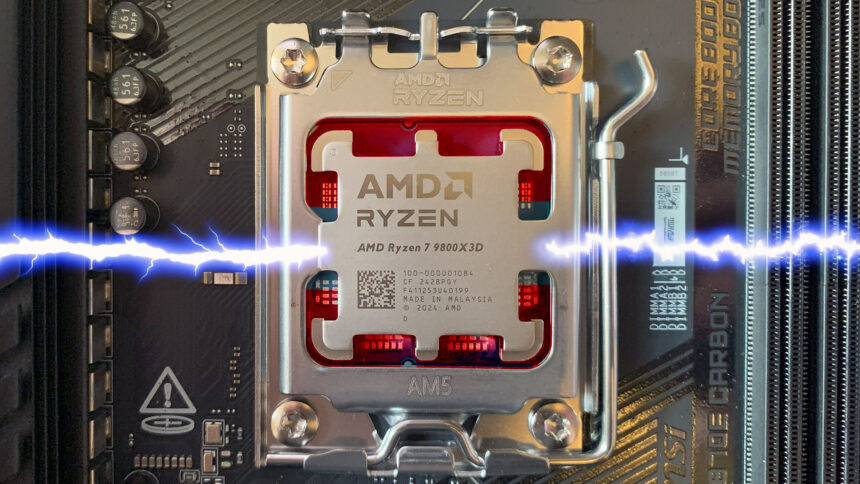
As we present in our Ryzen 7 9800X3D evaluation, this CPU is already the perfect gaming CPU you should buy proper now, which is partly all the way down to its clock velocity. Take a look at the 9800X3D specs, and also you’ll see that this AMD CPU can enhance to as much as 5.2GHz, which is 200MHz quicker than its predecessor, the 7800X3D.
What’s extra, in contrast to the 7800X3D, AMD has unlocked the multiplier on the 9800X3D, that means you’ll be able to even overclock it your self. On this information, we’ll present you the best way to add but extra megahertz to the clock velocity, so your CPU runs even quicker.
9800X3D overclocking fundamentals
Earlier than we get began, let’s simply cowl the essential ideas of overclocking, simply in case you’re new to the concept. Overclocking is the artwork of creating your CPU run past its rated clock velocity, and there are a selection of the way of doing it. Clock velocity is measured in MHz (or GHz), and the upper the determine, the quicker your CPU.
Nonetheless, the quicker the clock velocity, the extra warmth will likely be emitted by your CPU. We suggest you might have the perfect AIO cooler you’ll be able to afford connected to your CPU earlier than you begin. Fortunately, the Ryzen 7 9800X3D runs cooler than the 7800X3D, as a consequence of AMD’s determination to mount the 3D V-cache chip beneath the CPU cores, relatively than on high of them.
Nonetheless, you’ll nonetheless want an honest CPU cooler to maintain it in test. We achieved this overclock with a Corsair H100x Elite AIO cooler with a 240mm radiator, and we suggest utilizing a cooler with an analogous spec if you happen to’re going to aim to overclock the 9800X3D.
One other issue to think about is that overclocking your CPU usually means it requires extra energy to hit these clock speeds, which implies you might also want to extend the voltage utilized to your CPU. The 9800X3D runs at 1.22V as normal, however AMD has mandated a variety of 1.28V to 1.31V as secure for overclocking. Making use of extra voltage will once more end in your CPU outputting extra warmth, although, which is another excuse why you should make certain your CPU cooler is as much as the job.
Earlier than you begin, we suggest downloading CoreTemp from right here, and Cinebench R24 from right here, and working them in your CPU at its inventory velocity. Run the Cinebench R24 Multi Core take a look at to emphasize all of your CPU cores at peak load, and keep watch over the height temperature in Core Temp all through the entire ten-minute take a look at.
If the height temperature at inventory velocity stays beneath 85°C on this take a look at, then your system ought to have sufficient thermal headroom for this overclock. Keep in mind that this isn’t an actual science, although, and a few samples of the identical CPU will overclock greater than others.
9800X3D Ryzen Grasp auto overclock
We’ll begin with the simplest 9800X3D overclocking technique, which is to make use of AMD’s Ryzen Grasp software program with its automated overclocking function, and that is the strategy we suggest to most individuals. This useful piece of software program lets you overclock your CPU from the consolation of Home windows, with out getting your arms soiled in your motherboard BIOS. What’s extra, it solely impacts the enhance clock, relatively than forcing your CPU to run on the identical clock velocity on a regular basis, and it’ll additionally regulate the voltage on the fly.
The latter is a vital issue, as working your CPU properly past its really useful voltage can injury it if it’s overvolted completely, however that’s not a lot of a fear if the voltage is simply growing when it’s wanted. Utilizing this automated technique means your CPU received’t run at 5.4GHz with further voltage whenever you’re idly searching the Home windows desktop, however it should whenever you’re taking part in video games, which is when it’s wanted.

1. Obtain and set up Ryzen Grasp
You possibly can obtain AMD Ryzen Grasp from right here. Be sure you obtain the model specified for “Ryzen 3000 sequence processors and newer,” after which set up it in your system.

2. Create profile
AMD Ryzen Grasp works with a profile system, and you could find the profiles within the high left nook. There are two clean ones prepared so that you can customise, referred to as Profile 1 and Profile 2. Choose Profile 1, and click on the pencil icon subsequent to it to vary the identify. We’ve simply referred to as ours “200MHz overclock” for future reference.

3. Enter enhance override
When you’re in your profile, head to the Management Mode part and choose Auto Overclocking from the inexperienced menu on the high. Then head to the Enhance Override CPU part within the high left of the center pane. On this discipline, you merely kind within the quantity by which you need to elevate the clock velocity, relatively than the whole clock velocity.
So, to run your CPU at 100MHz past its 5.2GHz clock velocity, you’d kind “100” in right here, and your CPU would enhance to five.3GHz. We’ve typed in “200” right here, to run our CPU at 5.4GHz. Whilst you’re right here, guarantee that PBO Scalar is about to On beneath this part too.

4. Apply and take a look at
Ryzen Grasp now must guarantee that your chosen settings will likely be steady in your system, so click on on Apply & Check within the menu on the backside of Ryzen Grasp. It is going to then present a abstract of your adjustments, click on on OK, and Ryzen Grasp will then reboot your system. This will take longer than regular, so don’t be alarmed in case your PC doesn’t reboot instantly – our MSI X870E Carbon WiFi take a look at motherboard took a number of minutes to restart after we utilized these settings.

5. Stress take a look at
When your system reboots, Ryzen Grasp will begin robotically, so click on on OK when the warning comes up that it’s beginning. Ryzen Grasp will then conduct a stress take a look at to verify your system is steady at your overclocked settings, which takes a short while. Assuming your system is OK, your CPU will now have the ability to enhance to five.4GHz. If not, strive a smaller overclock, similar to 100MHz, to see in case your system can deal with that as an alternative. Our take a look at system was positive with these settings.

6. Monitor temperature and clock velocity
We now suggest monitoring your system to verify it’s steady. You possibly can run CoreTemp to watch the height working temperature, which wants to remain beneath 95°C to keep away from throttling (and damaging your CPU), and run CPU-Z (obtain from right here) to keep watch over the clock velocity (which Core Temp can’t do precisely with this CPU). Attempt working a CPU-intensive recreation in a window and you need to see the clock velocity enhance to five.4GHz with out it getting too toasty. The above CPU-Z screenshot was taken whereas working Far Cry 6, for instance, and reveals the CPU boosting simply previous 5.4GHz.

7. Get pleasure from your overclocked CPU
After overclocking your CPU, you’ll see an uptick in efficiency in video games that reply properly to further clock velocity, although not all of your video games. For instance, F1 24 ran on the identical body charge earlier than and after the overclock on our take a look at system, however Far Cry 6 responded properly to the overclock, including an additional 2fps to the typical body charge and 3fps to the minimal. The quickest gaming CPU is now even quicker.
Temperatures have been additionally positive, with the 9800X3D hitting 76°C throughout video games. That’s an excellent 9°C hotter than at inventory velocity, however it’s nonetheless properly out of the hazard zone. Nonetheless, throughout monitoring, we have been to see that the CPU voltage was sometimes boosting as excessive as 1.35V to keep up that overclock, which explains the additional warmth output.

9800X3D PBO BIOS overclock
If you wish to make your overclock everlasting, however don’t need to danger forcing all of your CPU cores to run on the identical clock velocity the entire time, you may also apply a lift override overclock in your motherboard’s BIOS, whereas profiting from AMD’s Precision Enhance Overdrive (PBO) tech.
PBO isn’t an overclocking know-how in itself, however relatively a manner in your PC to dynamically change the CPU voltage on the fly, in accordance with temperature and CPU workload. This in flip means your CPU can typically be equipped with extra voltage, which may allow it to spice up its clock velocity additional.
This technique has the benefit of that means the overclock is utilized by the motherboard when your PC begins, relatively than utilizing Home windows software program, but in addition lets you enhance your CPU’s efficiency with out having to completely run the voltage above its inventory settings. In comparison with a guide overclock, this technique reduces the warmth output of your CPU, in addition to the ability draw.

1. Enter the BIOS
Change in your PC, and hammer the Del key till your machine takes you into your motherboard’s Setup software program, in any other case referred to as the EFI, or BIOS. In case your PC boots into Home windows then you definitely’ve missed the window, so restart your PC and check out once more.

2. Discover PBO part
Your motherboard ought to have a bit the place you’ll be able to regulate the PBO settings. They have been discovered within the AMD Overclocking menu on our MSI X870E Carbon WiFi, however a little bit of Googling ought to let you know the place they’re in your motherboard if you happen to can’t discover them.
On some motherboards, you might want to modify the BIOS to its Superior mode as a way to entry these settings, and you’ll usually make this change by pushing one of many F keys – it should let you know the best way to do it someplace on the opening display screen, and it concerned hitting F7 on our MSI X870E Carbon WiFi motherboard.

3. Allow PBO and set limits
Discover the choice to allow Precision Enhance Overdrive (PBO) in your EFI, and set it to its Superior mode within the menu. Then set the PBO limits to “Motherboard.”

4. Set PBO scalar
Discover the Precision Enhance Overdrive scalar controls, and set it to Handbook. Then set the scalar to someplace between 7x and 10x. Setting it to 10x labored properly for our overclock.

5. Set enhance clock override
Make it possible for CPU enhance clock override is enabled, as this may allow you to extend the utmost enhance clock of your CPU. As with Ryzen Grasp, you then simply must enter the variety of megahertz by which you need to enhance the utmost clock velocity. We set it to 200, so it will probably go as excessive as 5,400MHz when circumstances permit.

6. Set curve optimizer
One ultimate tweak is to set the curve optimizer, with which you’ll change the curve (think about plotting the voltages on a graph), or dimension of the voltage-change steps out there to the CPU. Should you cut back these margins, you’ll be able to assist your CPU preserve a boosted clock velocity for longer. Set the optimizer signal to damaging, after which set the magnitude to -10, which labored positive with our pattern.

7. Save settings and exit
Save and exit the BIOS, both by urgent F10 or by discovering the part within the BIOS menus. Your PC will then shut down and reboot itself. In our case, the BIOS mysteriously thought we hadn’t made any adjustments, however the BIOS nonetheless made our requested adjustments anyway, and we have been capable of confirm them in Home windows.

8. Stress take a look at and benchmark
As you don’t have Ryzen Grasp to stress-test your system settings right here, strive working a few benchmarks to verify your system is steady, whereas working CPU-Z to test the clock velocity, and CoreTemp to watch the temperature, on the identical time.
We recommend working the complete ten minute Multi Core take a look at in Cinebench R24, after which hearth up a recreation for a couple of minutes too. As you’ll be able to see within the screenshot above, our CPU fortunately boosted to only over 5.4GHz when working Far Cry, though it ran at round 5.3GHz in Cinebench. In case your CPU is staying beneath 88°C throughout these benchmarks, and it’s not throttling, then you definitely’ll be positive. CoreTemp received’t detect the proper clock velocity of your CPU when utilizing PBO, however don’t fear about this, as you’ll be able to see the precise clock velocity in CPU-Z.
9800X3D guide BIOS overclock
The basic strategy to overclock your CPU, in fact, is getting down and soiled along with your motherboard’s EFI (extensible firmware interface), which is typically referred to as a BIOS (primary I/O system). This low-level setup software program controls how your motherboard interacts along with your elements. This overclock behaves in another way from the automated overclock outlined above, because it completely applies the clock velocity throughout all of the CPU’s cores, relatively than simply the enhance velocity.
Motherboards use quite a lot of terminologies right here, however the primary ideas are the identical. We don’t suggest this technique of overclocking if you happen to simply need your CPU to be quicker in video games, however forcing your CPU to run all its cores at this clock velocity may end up in improved multi-threaded efficiency if you happen to’re doing quite a lot of video encoding, for instance.
Your CPU has a base clock of 100MHz, after which a multiplier that tells the motherboard what number of multiples of the bottom clock make up the CPU clock velocity. So, as normal, the 9800X3D can enhance to a most of 5.2GHz, that means the multiplier is 52 (52 x 100 = 5,200MHz, or 5.2GHz). On this information, we’ll present you the best way to elevate this to five.3GHz, and in addition apply extra voltage to your CPU.

1. Enter the BIOS
Energy in your PC, and preserve urgent the Del key till it enters your motherboard’s Setup software program, in any other case referred to as the EFI, or BIOS. In case your PC boots into Home windows then you definitely’ve missed the window, so restart your PC and check out once more.

2. Discover the overclocking part
Your motherboard ought to have an overclocking part that provides you entry to the CPU clock velocity and voltage settings. On some motherboards, you might want to modify the BIOS to its Superior mode as a way to entry these settings, and you’ll usually make this change by pushing one of many F keys – it should let you know the best way to do it someplace on the opening display screen, and it concerned hitting F7 on our MSI X870E Carbon WiFi motherboard.
Typically the overclocking settings will likely be present in a particular part referred to as Excessive Tweaker, or one thing alongside these traces. Or, on some motherboards, together with our MSI X870E Carbon WiFi, there’s an AMD overclocking part within the Superior menu, and you’ll then open the Handbook CPU Overclocking submenu.

3. Change clock velocity and voltage
The terminology for altering the clock velocity varies between motherboard producers, however there are a number of key phrases to search for. In our case, our MSI X870E Carbon WiFi motherboard offers us the choice to easily kind within the offset, which implies the quantity by which you need to overclock your CPU. On this case, we wish the offset to be 100MHz, to overclock our CPU to five.3GHz.
Nonetheless, different motherboards could as an alternative require you to kind within the complete clock velocity, which in our case is “5300” (5,300MHz or 5.3GHz). Others may additionally require you to enter a multiplier or ratio, wherein case you should choose or kind 53 into this discipline.
We’ll additionally want to use some further voltage to the CPU so it has sufficient energy to keep up the additional clock velocity. Keep in mind that your CPU will likely be working at this voltage the entire time, so we don’t suggest going over the 1.31V restrict specified by AMD. On our take a look at system, we discovered 1.28V was positive for maintaining the CPU steady at 5.3GHz.
As with the clock velocity, the terminology for this setting varies between motherboards, however you need to search for the essential CPU voltage part. On our MSI X870E Carbon WiFi motherboard, we merely enter the whole voltage we wished to run, so we simply typed “1280” (1.28V) into the sector. Others could require you to enter (or choose) the offset or override as an alternative, although, wherein case you should kind within the distinction between the inventory 1.22V and your goal voltage, so you’ll kind “0060” to go from 1.22V to 1.28V, for instance.
4. Save settings and exit
When you’ve made your adjustments, and double-checked that you simply haven’t put any errors in them, save and exit the BIOS (you’ll be able to normally do that by urgent F10). Your system will then shut down and reboot itself robotically.

5. Troubleshooting
AMD methods typically take some time to reboot after they’re making basic adjustments to CPU settings, so give your PC an excellent couple of minutes to reboot earlier than you panic. Hopefully, it should then go into Home windows, and you’ll confirm that it’s hitting your specified clock velocity in CPU-Z. If nothing occurs, although, you might must clear your CMOS and check out some extra conservative settings.
Change off your PC by holding down the ability button, after which test your motherboard guide to learn how to clear the CMOS. Some motherboards have a useful clear-CMOS button on the rear I/O panel, or on the board itself, whereas others require you to maneuver a jumper on the motherboard. Comply with the directions to clear the CMOS, after which strive once more with a extra conservative overclock and voltage setting, or simply stick with working your CPU at inventory velocity.

6. Confirm your overclock
When you’re into Home windows, open CPU-Z to test that your motherboard is working at your set clock velocity. It could be a near-enough determine similar to 5,384MHz relatively than a straight 5,400MHz, however that’s positive. Likewise, the precise reported voltage could also be a little bit over or beneath what you set within the BIOS, however so long as it’s an excellent deal above 1.22V, it must be positive.

7. Stress take a look at
You now want to verify your overclock is steady, so run CoreTemp to keep watch over the height temperature, and run the Cinebench R24 Multi Core take a look at to push all of your CPU cores to most load. Our CPU temperature hit 87°C at 5.3GHz with 1.28V utilizing our Corsair H100X Elite cooler with a 240mm radiator, which is okay. In case your system locks up, however the temperatures nonetheless look positive, the CPU may have a little bit extra energy, so strive restarting your PC and inputting 1.29V as an alternative.

8. Cut back the voltage
As soon as your overclocked CPU is steady, return to the BIOS, and drop the voltage down a little bit, for instance, to 1.275 from 1.28B, re-enter Home windows, and stress take a look at it once more. If it’s nonetheless steady, then strive dropping the voltage once more, and repeat this till your system crashes in the course of the stress take a look at. If you discover an unstable setting, return to the voltage setting at which your system was final steady. Dropping the voltage as little as potential will assist cut back the working temperature and energy draw of your CPU.
That is fairly a conservative overclock, in fact, and if you wish to take the chance (and you’ve got a strong CPU cooler), you would additionally strive for extra. We discovered our pattern may run at 5,365MHz with 1.31V, however the temperature hit 91°C with our 240mm cooler. This isn’t fairly within the hazard zone, however it’s not far off it, so that you’ll want an honest cooler to goal this excessive.

9. Benchmark your overclocked CPU
With all our CPU cores continuously working at 5.3GHz, we determined to fireside up Cinebench R24 to see what it may do, and it’s certainly faster than at inventory velocity, with a rating of 1,380 in comparison with 1,361, and with solely a modest enhance in peak CPU temperature from 84°C to 87°C.
That’s a small enhance in velocity, although, and demonstrates that a big a part of the 9800X3D’s efficiency benefit over the 7800X3D is all the way down to its use of the brand new Zen 5 structure, and never simply its quicker clock velocity. Should you actually need to run closely multi-threaded software program in addition to video games, you’ll be higher off both shopping for an Intel 14th-gen CPU, or ready for AMD’s future X3D Ryzen 9000 chips with extra cores, relatively than overclocking the 9800X3D.

Conclusion
We love the truth that AMD has made the 9800X3D overclockable, because it offers fanatics a strategy to experiment with their chip and make it even quicker in video games. The truth that you will get an honest body charge enhance in video games from the consolation of Home windows can also be nice for players who need to get began in overclocking.
Should you’re trying to overclock your 9800X3D, we suggest utilizing AMD’s Auto Overclock function in Ryzen Grasp, which retains the temperature in test, continues to regulate the voltage and clock velocity on the fly, and nonetheless offers you an honest enhance to border charges in video games. The truth that you are able to do all of it from the consolation of Home windows is an added bonus.
The advantages of a guide overclock are doubtful, although, with our pattern struggling to get past 5.36GHz without having greater than 1.31V, and even then it received scorching and nonetheless couldn’t overtake the Core i5 14600K in Cinebench. Should you actually desire a CPU that may race by way of closely multi-threaded workloads, whereas additionally being good for gaming, you’ll be higher off studying our Core i9 14900K evaluation or ready for AMD’s future X3D CPUs with extra cores.
Should you assume you would possibly want some extra cooling energy to overclock your 9800X3D, take a look at our information to the perfect CPU cooler, the place we take you thru all our favourite choices to swimsuit each finances.